Welcome!

Welcome to the forum for collectors, restorers and fans of flip clocks. Please Sign Up if you would like to take part.

By the way, signing up is free..

Announcement

Collapse
No announcement yet.

General Time / Westclox / Seth Thomas M5 motor repair

Collapse
X
 
  • Filter
  • Time
  • Show
Clear All
new posts

    General Time / Westclox / Seth Thomas M5 motor repair

    Hi, I like to share a motor repair I just did that might be of interest to someone.

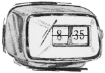
    It is a General Time M5 motor. I believe this is used in several clocks, mainly Westclox and Seth Thomas, since that is the same company. Mine I found in a Philips 90RS455 that I’m restoring. It has the Westclox ‘fake LED on film’ clock mechanism.

    The motor was running and the outgoing axle axle turned but it could not transmit any load. The field coil was thus ok, but there was something wrong in the capsule. You could easily turn the outgoing gear by hand and it felt like something must be slipping inside.

    Now I could ofcourse look for a replacement on the internet or ask on this forum, but I thought: I have this motor, it is broken, I have nothing to loose, so why not give it a try? I can at least learn something from taking it apart.

    So I opened up the capsule by carefully folding back the rim of the case. Did this very slowly, going round and round in circles, to avoid tearing the aluminium.

    Inside is what you expect from a synchronous motor: a rotor and a gearbox. The gearbox has mostly metal gears and one or two plastic ones. Unlike the Telechron motors there is no lubrication.

    It appeared one plastic gear was slipping on its axle. I could slide it a bit on the axle and in some positions it did get a better grip, but did this not feel as a good long term solution. So I decided to fix it with some superglue.

    To apply the glue I first moved the gear a bit to one side, then transferred a tiny bit of glue to the axle using the eye of a needle, and then immediately shifted the gear in place. I did a few dry runs before to practise this tricky operation. You don't want the glue anywhere else!

    This did the trick. The gear is firmly attached and I could even make the rotor spin by turning the outgoing axle.

    Last step: folding back the rim and make it look like nothing ever happened (well, almost).

    #2
    Thanks for sharing this! I have done up two of these motors now, but have never actually seen a 220 version of it! Mine just needed lubrication on the inside and putting back together.

    Comment


      #3
      Ah, so it can use some lubrication? It looked to me like there was none in there or maybe only a very light oil.
      It is running smooth now, so I'm not going to open it up again.

      Comment


        #4
        Originally posted by Johan de Jong View Post
        Ah, so it can use some lubrication? It looked to me like there was none in there or maybe only a very light oil.
        It is running smooth now, so I'm not going to open it up again.
        I understand that! Getting into those is hard. There’s a sort of sponge up in there that I think was originally saturated with oil. But unless it starts making a racket, I wouldn’t go back in either.

        thanks for posting.
        ~ Mackey Site Administrator
        If you have any questions/comments Contact Me
        If you're not a member, you should consider joining!

        Comment


          #5
          What I lubricated were the parts which seems to have been lubricated originally. I was careful not to touch the 'flywheel' with oil for that did not seem wise.

          Comment


            #6
            I remember opening mine for my Seth Thomas day date. it was a precarious project for sure! For the next person who does it, I would honestly recommend using some soldering snips to remove the folded part of the casing then just using some hot glue or other careful sealant to seal it all back up again after service.

            Comment


              #7
              Nice job on the fix.

              Lubrication in the key areas is crucial on these. I have had one or two that were quite warm, almost hot, from friction. Interestingly the few I have done did not have the oil-soaked sponge for time-release lubrication. Probably a modification along the way at the factory.

              This motor seems to like lubrication in the same spots as Copal motors.

              Comment


                #8
                Thanks all!
                I don't remember seeing a sponge in there, but I could easily have missed it since I wasn't expecting it. I'll check the temperature once I let it run for longer (which I will not do this often since it has the brittle film mechanism. I like to keep my clocks running, but I think I'll make an exception for this one).
                First need to fix several other issues with this clock though: the minutes are out of sync, the alarm is on all the time, the color on the window before the clock has worn off in places and the AM antenna got disconnected. Good I do this for a hobby and not a living ;-)

                Comment


                  #9
                  Hi Johan,

                  Could you tell me where I can get green neon bulbs for a panasonic 6551/ Cant find em anywhere! Thanks so much.

                  Comment


                    #10
                    Hi Gary,

                    I think you meant to sent me a personal message, since this is a bit off topic in this thread, but never mind that ;-)

                    If you are in North America bulbtown.com is the place to go.
                    If you are like me in Europe I recommend conrad.com.
                    And in this post you find some more sellers:
                    <br> <p> <img style="border: 1px solid; border-color:#000000; width: 100px; height: 150px; float:left; margin: 2px 10px 2px 0px" alt="" src="/forumimages/neon/neon_glow_blub.jpg"> A very frequent question amongst fans of flip clocks, can be paraphrased: "Wouldn't it be better


                    Hope this helps.
                    That Panasonic 6551 is a very nice clock! I happen to have one myself that is waiting to be restored.

                    Comment


                      #11
                      HI, Johan, THANK YOU for posting this. I have a Juliette FDC-1067 that has a General Time M5 motor that wouldn't run. I was able to repair the motor using your method.

                      I'd researched synchronous motor repair extensively and almost all the other resources involve pretty much filling the motor with oil. In my case the gears were dry and the repair was to lubricate the rotor. I dripped a drop of turbine oil down a solid 30 ga copper wire touching the rotor shaft. I still got oil on other gears, but the motor is now running. It runs hot, close to 150 degrees Fahrenheit, consuming 6 watts according to my Kill-A-Watt. The clock radio is transistorized, rated 10 watts, so I don't consider this excessive current draw. I can't tell what bulbs it uses but they are probably incandescent, as the bulb leads coming from the motor coil measure 9 VAC and the bulbs themselves measure 5 ohms.

                      However, as with your clock, the minutes don't line up. The number strips are driven like a filmstrip on a sprocket. MIne are off by one spocket hole. The minutes strip winds towards the back around a non-rotating "roller" seen under the numeral 1. Interestingly, the rollers under hours and 10 minutes (4 & 3) are designed to spin. Under the 1, the strip winds toward the front and then down and toward the back, at this point engaging several of the spocket teeth on a large clear roller.

                      The minutes strip is a bit looser than the others, but not loose enough to jigger into proper alignment. I don't see any type of tensioner. It's perplexing how yours and mine both are out of alignment after removing the motor. Why would that have throw off the alignment?

                      From this I conclude that UNLESS the manufacturer included a clutch to help align the numbers, the only ways to align them is to either disassemble the mechanism or to cut the strip. There is already a seam between the 0 and 1, appearing in the photo as a ridge. I could not find any tape above or below the seem. It looks as is if the film was glued at the seam. I wonder how that would have held up so long.

                      Click image for larger version

Name:	clock.jpg
Views:	277
Size:	54.9 KB
ID:	27887

                      To fix it I looked up the patent, which has copious text describing the inner workings and exploded drawings. However I've not yet found an easy way to align the minutes.

                      I'm hoping someone here knows of a sequence or method that might actuate the clutch I'm hoping exists. Thanks for any help.

                      Comment


                        #12
                        Hello Tom,
                        Good to see you got that motor running again! For the misalignment of the minutes I still do not have a solution. I never finished work on that clock and instead found this Vendomatic that was properly aligned (but had a different issue). I don't think there is a clutch mechanism, but I can't be sure without taking the mechanism apart. And that is a big problem as this mechanism is not designed to be taken apart (I think a better description is that it is designed NOT to be taken apart). I would not cut the film as I think it will be difficult to mend it afterwards. There is already a lot of friction and I think any tape or stiffness added to the film will make it jam. I see as only option to be brave and go where no man has gone before and carefully take the mechanism apart

                        Comment


                          #13
                          I have completely disassembled one of these mechanisms before. I had a nonworking one that I took the motor from to fix a better one. What I did was completely disassemble everything and throw it in a plastic bag for about six months. After that I attempted to figure out how to reassemble it logically. Once I got it back together I had the confidence to take my working one apart to change the bulb. Yes, the entire mechanism has to be completely disassembled to change the bulb. Crazy. Very fragile and very difficult to make everything line up correctly, lots of trial and error. If anyone ever needs some help I've taken lots of pictures and can describe the process in pretty good detail.

                          Comment

                          Working...
                          X