

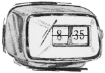
This is a mains operated 24hr (240V Ac 50 Hz) Australian branded Jadco DT17 aka Twemco.
I know my way around this model well now.
I purchased this clock in reasonable condition but it had a few problems.
The first problem was the synchronous motor was fairly noisy. This was a simple fix as the motor and gearbox, unlike many Copals, can be fully stripped down, cleaned of old lube, re-lubed and reassembled. All good. In fact great.
The next problem was that the solenoid wouldn't advance the date on days less than 31 in the month. The clock would simply run out the full 31 days in any month regardless. There are tiny contacts that needed cleaning on the day and month wheels. This was very fiddly but I got there in the end.
The third problem was that this clock (traditionally used in banks and government institutions in Australia) had unfortunately been hung facing the direct hot summer sun. Many of the cards had warped in the heat. I managed to find a "clunker" on Ebay going cheap. I purchased it on a gamble that the cards would be better/straight. I lucked out big time. The clunker looked terrible but was mechanically excellent. I had a full suite of spare parts for my project clock. So the flip cards were sorted out in the project clock quick smart.
One of the things I felt this model lacked was lighting. I can't understand why this model didn't and still does not have lighting, even something basic. It has ample internal room. So being an electrician with much patience for this clock, I set about creating a lighting system for it.
I installed a single-pole digital Theben timer and 12V led switch mode power supply. This feeds through a photoelectric cell which brightens the dial lighting in the early evening and then after the ambient daylight subsides the photoelectric transfers through a night time PWM variable digital dimmer. Night time dial lighting is set to your preference. The lighting is set to switch on at 5 O'clock in the evening and off at 7:30 in the morning.
This clock took me about a month and a bit of evenings to get it how I wanted it (plastic polishing included)


 I'm not really a die hard flip clock fan, however love having this thing flipping away while I work, you always know the top of the hour when they all drop.
Comment